




 View Count:44
 Date:2026-09-04
“My fridge door gasket is turning black with mold” and “my refrigerator smells musty every time I open it” are the two most common complaints in appliance after-sales and home cleaning. Many people blame the food, but refrigerator mold mainly hides in four dead corners: the door gasket, the drip tray, under the crisper drawers, and the drain hole. The 2-8°C interior does not stop “psychrophilic” molds (species such as Cladosporium and Penicillium that grow at 0-10°C) once humidity is right. This guide gives households an actionable cleaning routine, and gives refrigerator and appliance makers a source-level plan for “fridges that do not easily grow mold”.

1 Why Do Refrigerators Mold and Smell? Four Dead Corners
Divide the fridge into four zones and the smell and spots make sense:
- Corner 1 — the door gasket. Most door seals are PVC or silicone-rubber magnetic strips with folds that collect condensation, food juice and dust — the top spot for black mold and the number-one source of musty odor.
- Corner 2 — the drip tray above the compressor. Defrost water collects here, permanently damp and unventilated; the tray walls grow a slippery mold film. This is another major “smelly fridge” source that most people never clean.
- Corner 3 — under crisper drawers and slide rails. Rotting leaves and spilled juice ferment at the bottom, forming a local mold culture bed.
- Corner 4 — the drain hole. When the rear-wall drain hole blocks with food debris, water backs up and mold grows down the hole into the insulation layer.
Once you know the four corners, the method is clear: do not mask the smell with freshener — clean the breeding points and keep them dry.
2 Home Cleaning: A Three-Step Mold Removal Routine
Clean the fridge once a quarter, about 40 minutes, in three steps:
Step 1 — unplug, empty, remove detachable parts. Unplug the fridge, take out all food, remove shelves, drawers and crispers; remove the door gasket if possible. Wash plastic parts in warm water with neutral dish soap, scrubbing crisper corners and rail grooves.
Step 2 — treat the mold. For black mold on the gasket: wipe with a soft cloth dipped in 75% medical alcohol or white vinegar diluted 1:3; use cotton swabs inside the folds; for stubborn spots lay an alcohol wipe on the area for 5 minutes before wiping. Never use steel wool or strong alkaline cleaners — they scratch the seal surface and give the next round of mold an easier grip. Drip tray and drain hole: soak the tray 15 minutes in diluted chlorine bleach (e.g. 1:50), rinse; clear the drain hole with an alcohol cotton swab, then flush with a little warm water from a syringe.
Step 3 — dry thoroughly before reassembly. Wipe every part dry, leave the door open 2-3 hours to ventilate, and only restock once the interior is fully dry. Dryness is the root of mold prevention — when humidity is down, surviving spores cannot regrow.
3 Deodorizing: Adsorption + Inhibiting Products, Used Correctly
Odors are of two kinds: food cross-smell (solved by adsorption) and metabolic odor from mold/bacteria (needs inhibition). Match the product:
- Everyday cross-smell, new-fridge plastic smell: use a physical-adsorption deodorizer such as the CW microcapsule odor-eliminating bag, which adsorbs formaldehyde, TVOC and assorted odors — place it on a shelf corner and replace every 1-2 months. On a budget, activated-carbon packs work too (reuse by sunning 4 hours monthly).
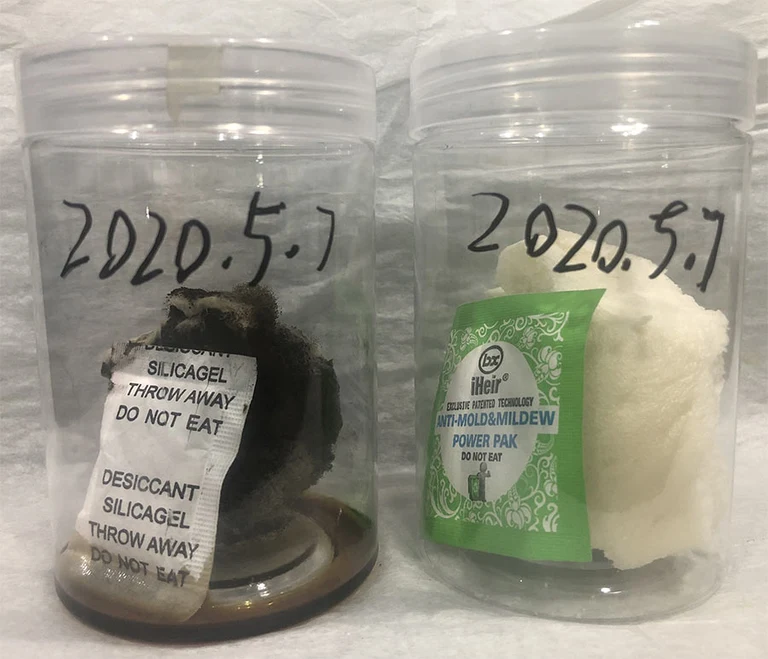
- Musty and fishy smells (needs inhibition): use a product with both anti-mold and deodorizing action, such as Power Pak anti-mold deodorizing tablets — open the pack and place it in a fresh-food or freezer corner; one tablet covers roughly 0.5-1 cubic metre by slow-release gas-phase inhibition. Ideal for stubborn-smelling fridges.
- What not to do: do not mask with perfume or air freshener — mixed smells are worse and mold is untouched. Do not replace deodorizers with open lemon slices or coffee grounds (weak, re-contaminating, high maintenance; acceptable only as a temporary measure).
4 For Appliance Makers: Stop Mold at the Component Source
For refrigerator and appliance factories, “gasket mold” and “fridge smell” are a real share of after-sales complaints, and both can be solved at the component source — turning antimicrobial performance into a selling point:
- Antimicrobial door gaskets: gaskets are usually PVC or silicone rubber. Silicone gaskets can take an antimicrobial at the compounding stage (e.g. GGTK silicone antimicrobial agent); PVC gaskets use a PVC-compatible antimicrobial masterbatch. Antimicrobial seals suppress mold in the folds — the “black gasket” complaint disappears at the source.
- Antimicrobial liners and crispers: liners are usually HIPS, crispers PP/AS; adding 1%-3% antimicrobial masterbatch before molding protects the whole part. For the selection logic (organic vs inorganic, food-contact compliance) see types of plastic antimicrobial agents for food-grade plastic — liner materials must additionally confirm food-contact safety and low-temperature performance.
- Verification and marketing: test treated parts to ISO 22196 / GB/T 31402 (antibacterial rate ≥99% against E. coli and S. aureus) and to GB/T 1741 or AATCC 30 for mold resistance; the reports back an “antimicrobial refrigerator” claim. Broader appliance thinking is in antibacterial agents in home appliances.
5 Preventing Recurrence: Five Fridge Habits
After cleaning, five habits keep a refrigerator clean for the long term:
- Store food sealed: use containers or cling film for leftovers; wash and drain produce before storing — this cuts the moisture and odor sources inside.
- Do not block the drain hole: keep food away from the rear-wall drain; clear any standing water immediately.
- Set temperature near 4°C: run fresh-food at 3-5°C and freezer at -18°C — fresh food stays good and psychrophilic growth slows.
- Monthly quick check: wipe gasket folds and the drip tray on the spot — far easier than a quarterly deep clean.
- Leave the door ajar when unused: a powered-off fridge with the door closed is a sealed damp mold incubator.
6 FAQ: Fridge Mold and Odor
Q1: Is mold on the fridge gasket harmful? It can be. Spores from gasket mold (Penicillium, Aspergillus and others) drift into the air and onto food surfaces when the door opens; allergic people, children and the elderly may develop respiratory irritation. Clean promptly when found; replace a badly blackened or deformed gasket (typically inexpensive, same-model seals are available online).
Q2: Which fridge deodorizer should I choose? Match the odor: cross-smell → activated carbon or a CW adsorption bag; musty/fishy → an inhibiting product like Power Pak tablets. Avoid “fragrance-masking” types either way.
Q3: Can a moldy fridge be used again after cleaning? Yes. Clean the four corners by the three-step routine, dry thoroughly, and it is safe. Only fridges with mold deep in the insulation layer (visible on disassembly) should be retired.
Q4: Why does my gasket always grow mold? Usually dirt in the folds + humid room + infrequent cleaning. Fix: wipe the gasket regularly, dehumidify the room, and check for aged/deformed seals (deformation worsens condensation). If a new seal still molds repeatedly, switch to an antimicrobial gasket.
Q5: Is an “antimicrobial fridge” expensive for makers to build? Controllable. Adding antimicrobials to gasket, liner and crisper resins adds only a few yuan per unit yet cuts mold after-sales sharply and supports the selling point. Pilot with an antimicrobial gasket first, validate with test reports, then extend to liner parts.
Q6: Can one moldy food item “infect” others in the fridge? Yes. Spores from moldy food survive long in a sealed cold space and settle on other food, germinating when temperatures rise. Remove any moldy item immediately in a sealed bag and wipe the contaminated area.